We’ve reached the breaking point.

For a while, Sam and I prioritized pretty much everything else above art. We just didn’t have enough functionality in our home yet to warrant spending any kind of money on art. Plus, we’re both picky, and we weren’t willing to buy the super-bargain art we would have had to settle for just to get something up on the walls. We want what we want. And much of the time, we’ve learned that means we’ll have to wait.

Such is life.

Now though, we’re just about ready to pull the trigger on several prints. But the question remains: how to hang them? Our tall walls call for large and larger pieces, but large frames run expensive even on the dirt-cheap end. So I’ve been keeping my eye out for inventive solutions.

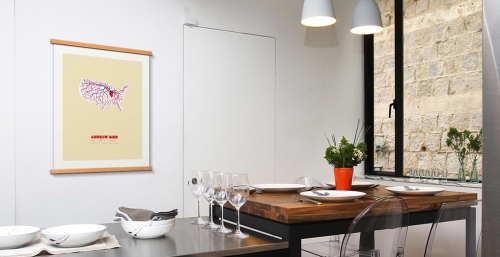
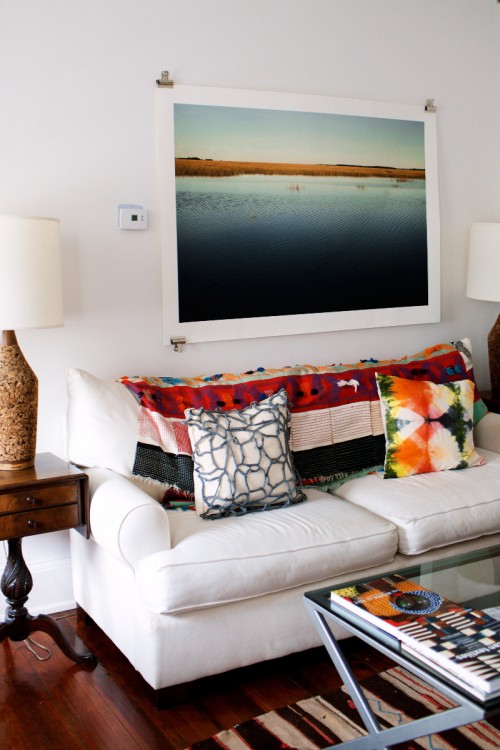
Hanging Art - clips

Olivia James via Design*Sponge

I only saw this idea recently, noticing it just before clicking away from a home tour on Design*Sponge, and I really love it. The clipboard or skirt-hangar solutions don’t appeal to me (though they are definitely cheap and practical!) and this clip solution feels like a step up from those.

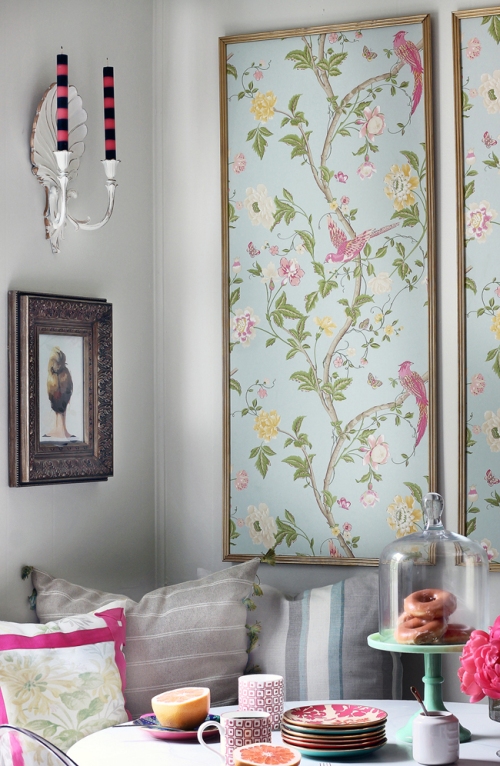
Hanging Art - Wallpaper panels


Via The Hunted Interior

I’ve been looking at wallpaper samples we might want to use as art for a while, so seeing this made me very happy – I don’t love many projects that require me to ask people at Home Depot to cut things for me, but this might be worth it. I have had success with plywood projects lately.

Hanging Art - Stiiks


Via Stiicks 

Stiicks are definitely not the cheapest option, but they are relatively affordable, versatile, and super cool. I love that they don’t detract from the art by being either too gaudy or too unappealing, and I also love that you can switch out the art whenever you like, putting multiple prints on one pair or using multiple pairs to hang one print. These are going on my birthday and Christmas wish list.

I’ve found tons of resources for cheap hanging ideas, and while there are good ways to get it done, none are great and not all are actually all that cheap. We’ll definitely pick up some frames from IKEA the next time we’re there, and we might also look to the Little Green Notebook for help (because when do I not?). Let me know if you have any ideas! I’ll let you know when we’ve made progress with our walls.

 

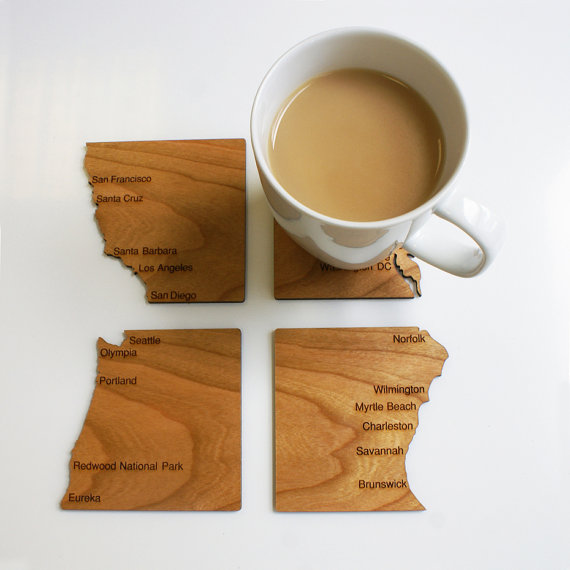
There was a moment, a while ago, when several things conflated into an impossibly good idea. I was saying something to Sam about how he could never understand what I was talking about (who knows exactly what it was that we were talking about) because he was an east coaster and I’m a west coaster (never mind the fact that I identify as an east coaster or west coaster as it suits me to do so). Simultaneously, I was setting a cold drink down on our table and thinking idly that we should get some coasters.

EastWestCoaster2

via FabAllThings

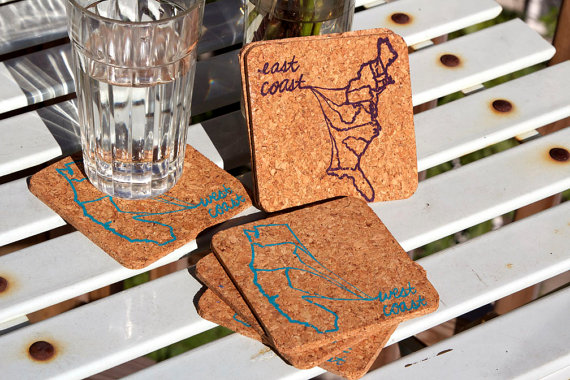
EAST COASTERS. WEST COASTERS. It’s like all of my favorite things wrapped up into one perfect concept. Puns. The two beautiful coast of this country. Home decor. Perfection.

EastWestCoasters1via ShiftingStatusKuo

And with the vast and unending internet at my disposal, it didn’t take long to find a couple of options. But of course, I’ve also started to wonder if I could make these myself…

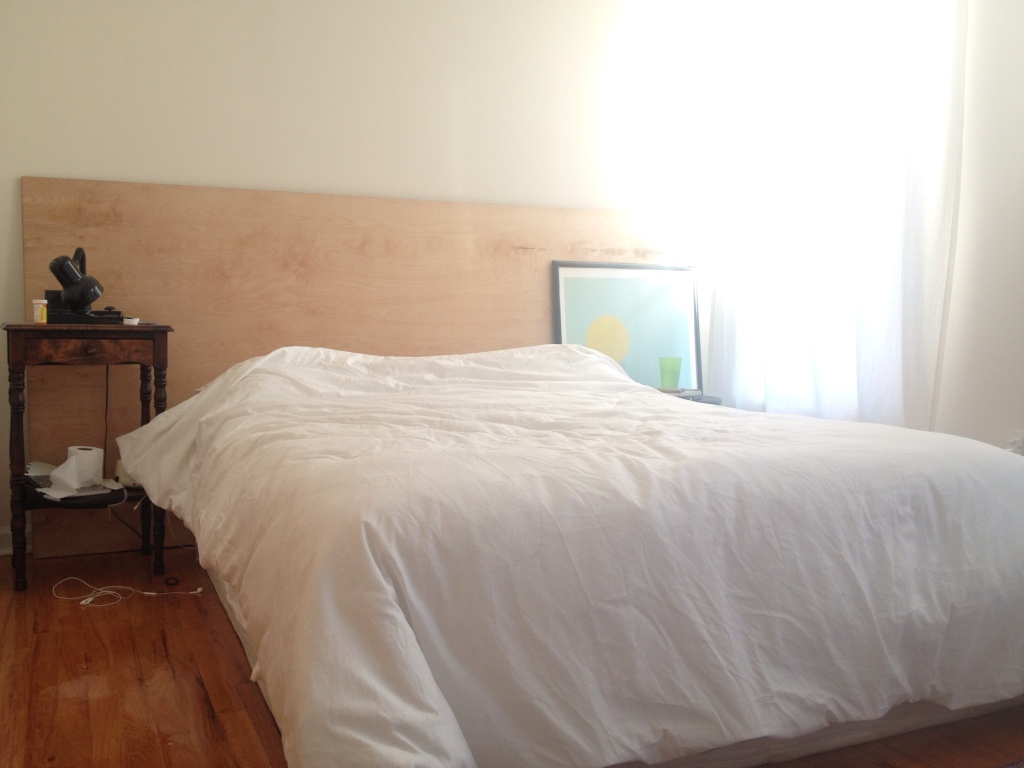
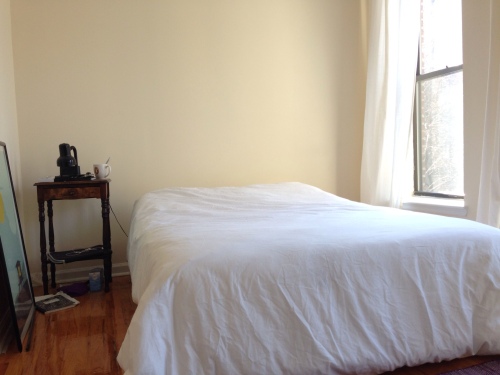
Our headboard was making me sad. On sunny weekend days it looked fine, but every night it made our white sheets look grungy, our walls look yellow, and just made our whole room look odd.

As soon as Sam’s finals were over (I never took the LSAT or applied for Law School, and yet, law school finals take over my life every six months), I practically ran to Home Depot to get tape and paint. After shoving my inspiration photos in Sam’s face every night for about five days to make sure he was onboard (he’s been known to say, go ahead darling, I trust you! and then hate the final product before), I got to work.

wpid-Photo-20140505212343.jpgMeh.

Sam suggested a herringbone pattern, which was pure brilliance. In an ideal world where I have a saw in my house, I would’ve gone totally nuts on this project and done an actual wood herringbone design by staining pieces of two by fours to varying degrees, cutting them down, and nailing/using woodglue to adhere them to the plywood. But those living in a city that charges 46 cents a cut must learn to do without a magnificent wooden herringbone headboard. So instead we went with paint.

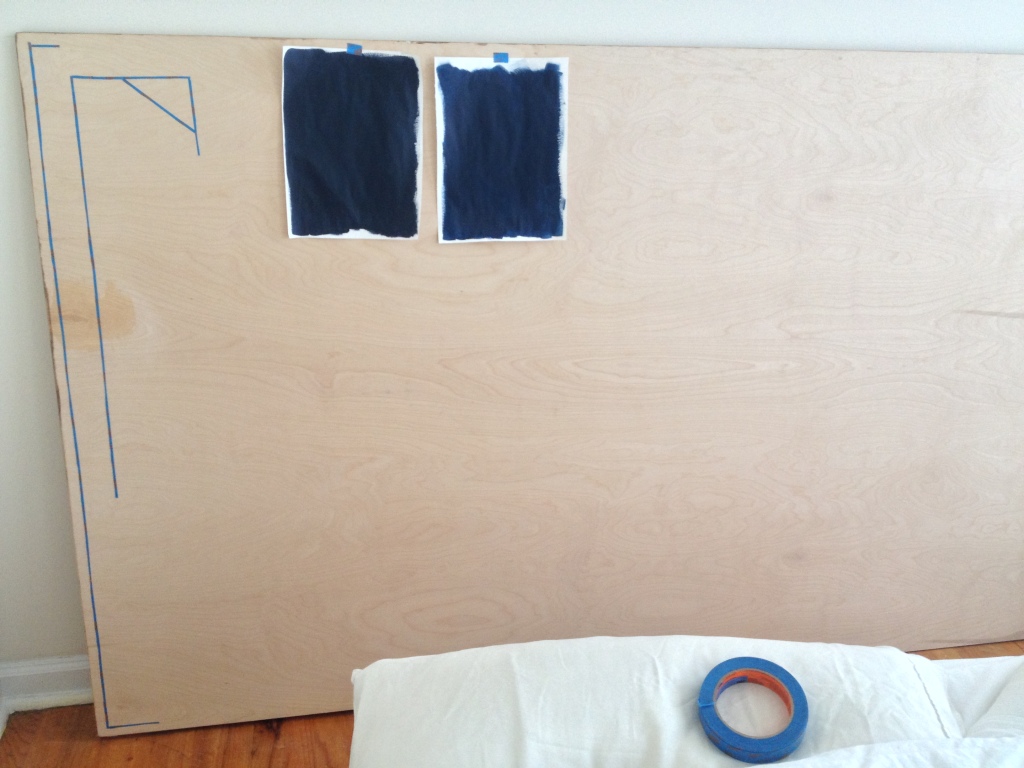
Paint swatches

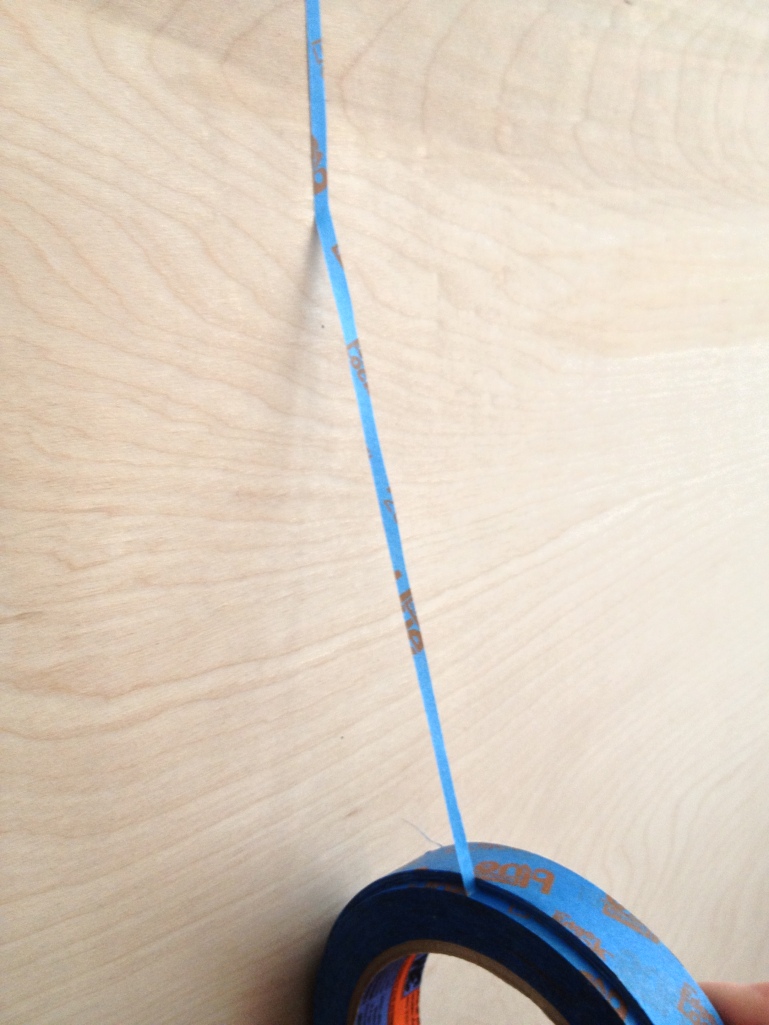
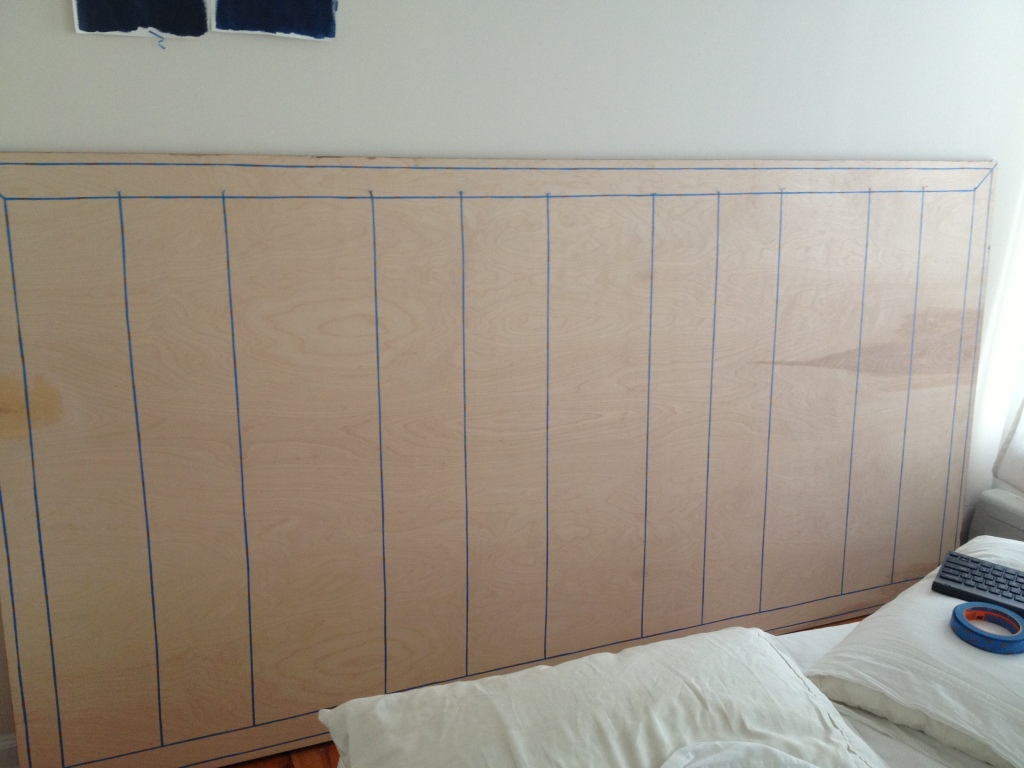
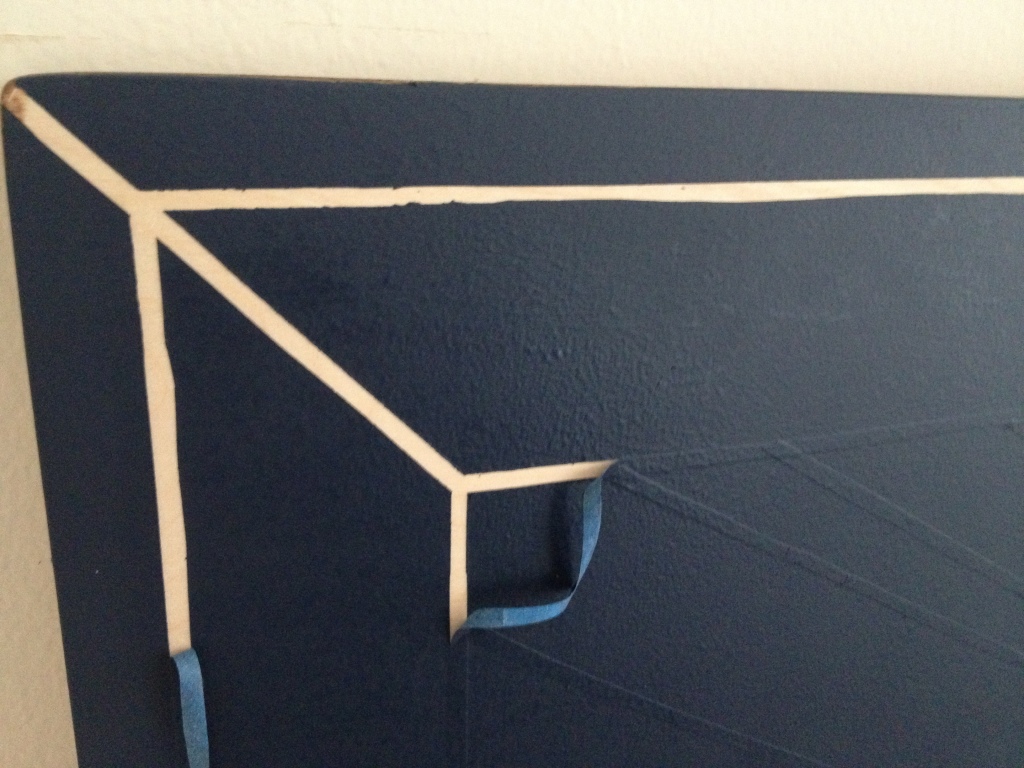
I wanted to include some kind of border around the edge of the herringbone pattern, thinking it would look weird and unfinished if the pattern went all the way to the edge of the plywood, so I mimicked a typical herringbone floor. The outermost tape was about 3/4 of an inch from the edge and the innermost tape was about 3 inches. To keep it even, I measured 3/4 of an inch and 3 inches from the edge every 8 inches or so and made a teeny mark with a pencil, which I used as a guide when applying the tape. To get the tiny strips of tape, I used an X-Acto Knife to cut along the edge of my tape, leaving it on the spool for stability as I taped.

Photo May 23, 5 50 59 PM

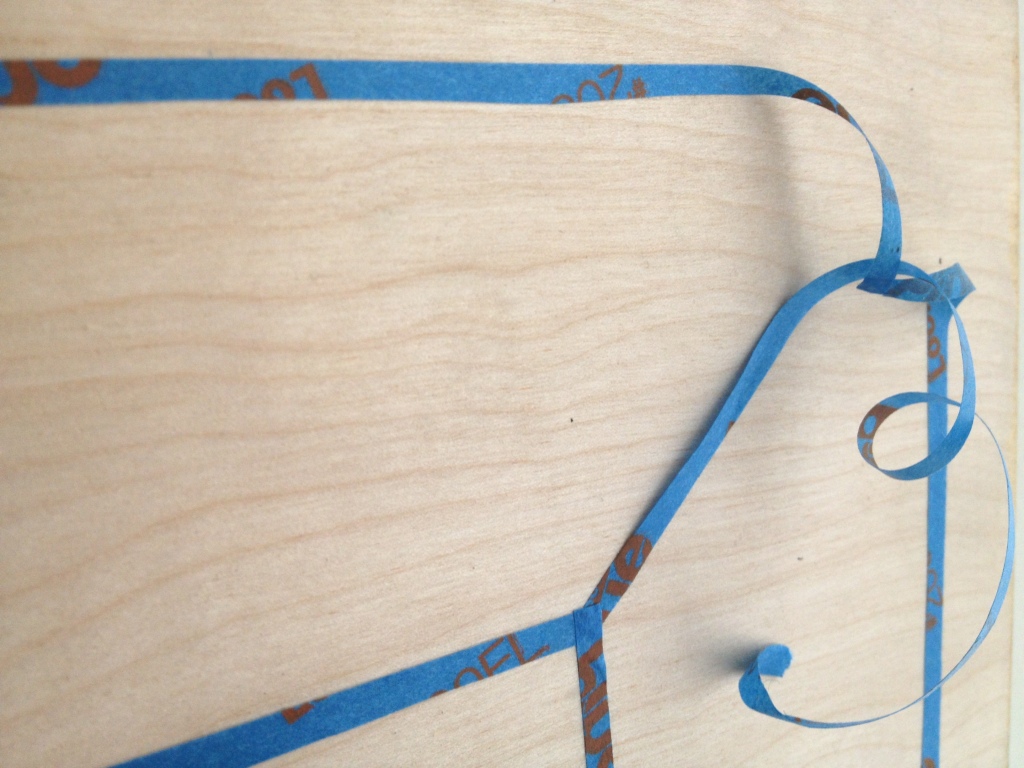
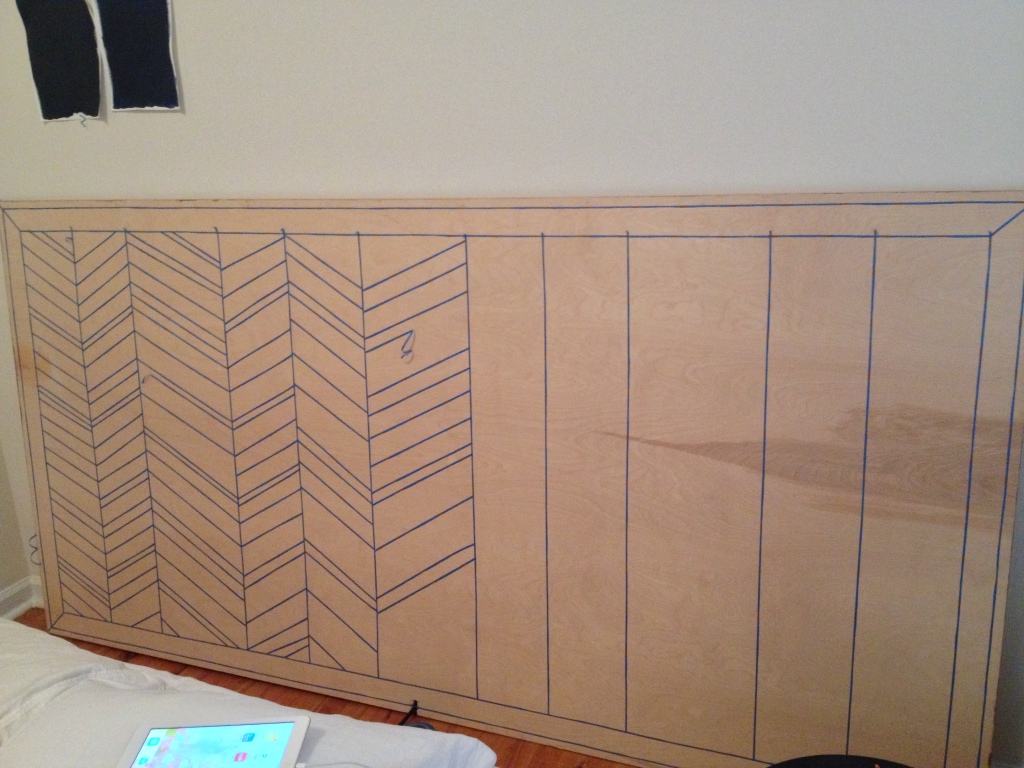
The one thing I worried about was how I was going to get the tape off when the paint was still not quite dry without smudging everything, so I made sure these diagonal pieces of tape going to the corners from the borders went under the border lines. That way, I could pull up the tape from the corner and start pulling up the rest of the tape in the process. At least, that was the goal.

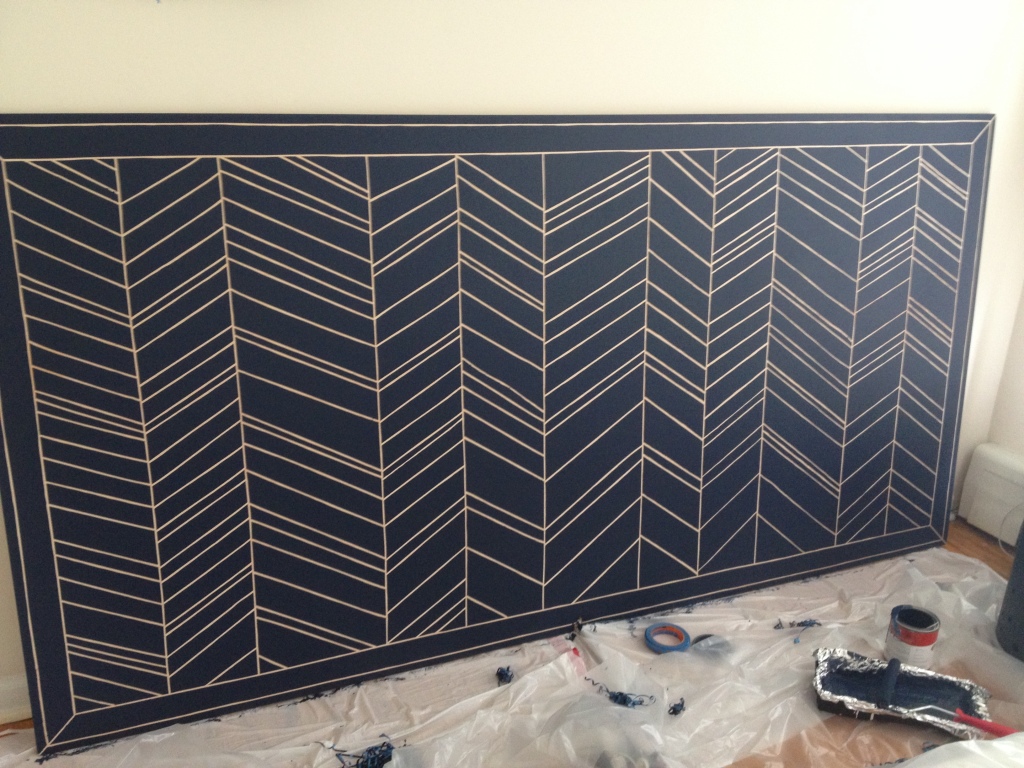
Photo May 23, 4 52 37 PMI copied my inspiration photo when it came to spacing between the dividing lines, as well. A pattern of two narrow sections, one wide, with the narrow sections about 7 inches in width and the wider sections about 10 inches. I didn’t worry too much about being precise.

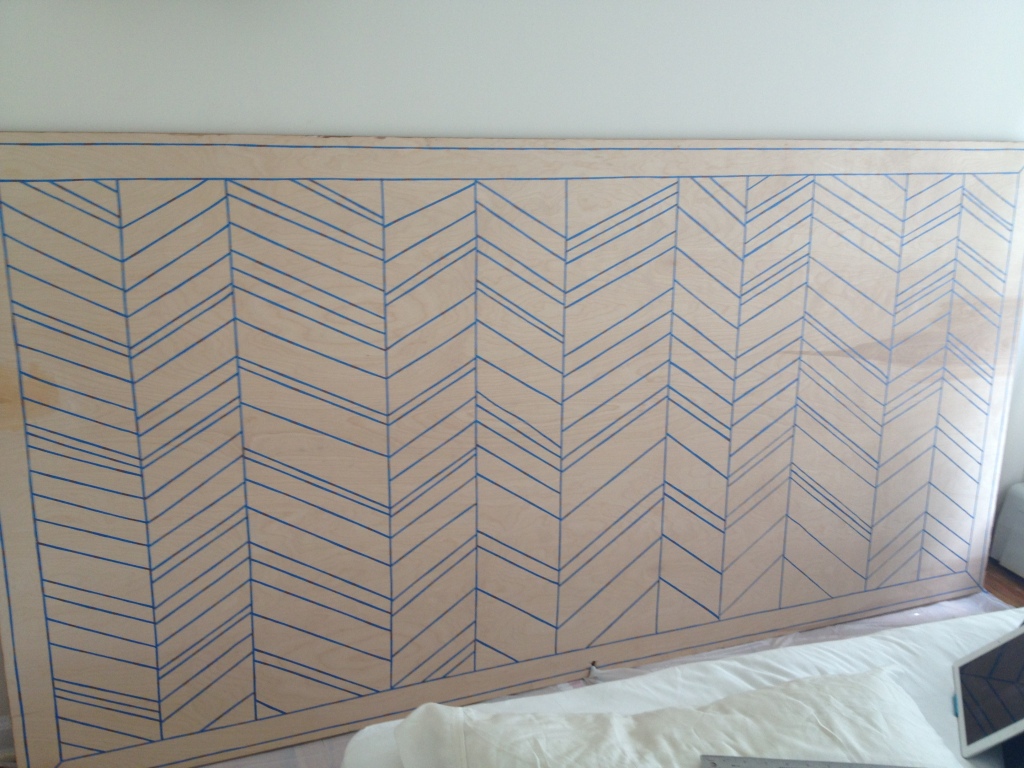
Photo May 23, 5 54 42 PMNext I started taping the herringbone! I reasoned I could always paint over some of the lines if there were too many, but I wouldn’t be able to recover the wood if it looked too sparse, so I went a little crazy with the tape.

Photo May 23, 7 29 32 PM

Before painting, I carefully went over every single piece of tape with one of Sam’s plastic collar stays – the rounded edge made it perfect for pressing down the tape. I also made sure to press the edges where the tape overlapped really well to make sure there was absolutely no space where paint could seep through.

Photo May 27, 1 43 18 PM

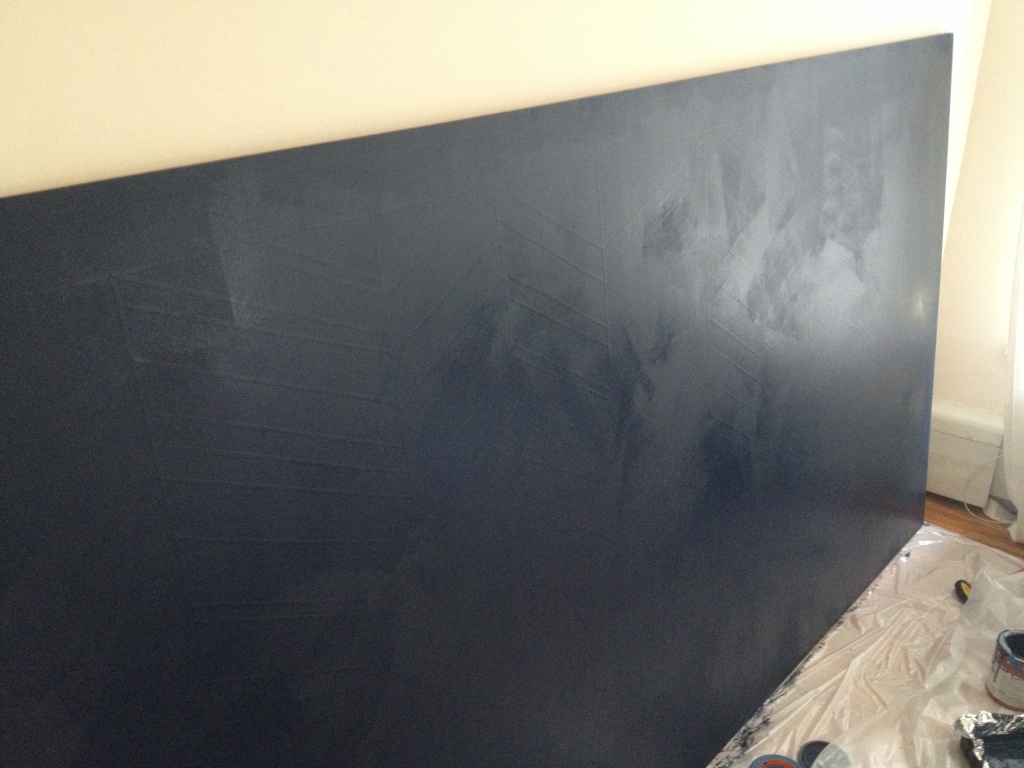
Then I painted using my trusty roller! I used about 2/3 of a quart of paint for this 4×8 piece of plywood.

Photo May 27, 2 19 19 PM

I started pulling off the tape almost immediately after my second coat.

Photo May 27, 2 21 03 PM

SOB. IT WORKED. The corner tape thing worked as well, making it easy to pull up the rest of the tape.

Photo May 27, 2 37 03 PM

SIGH. OF. RELIEF. After the let down that was the last headboard reveal, this made me SO incredibly happy.

Photo May 29, 7 18 15 PM

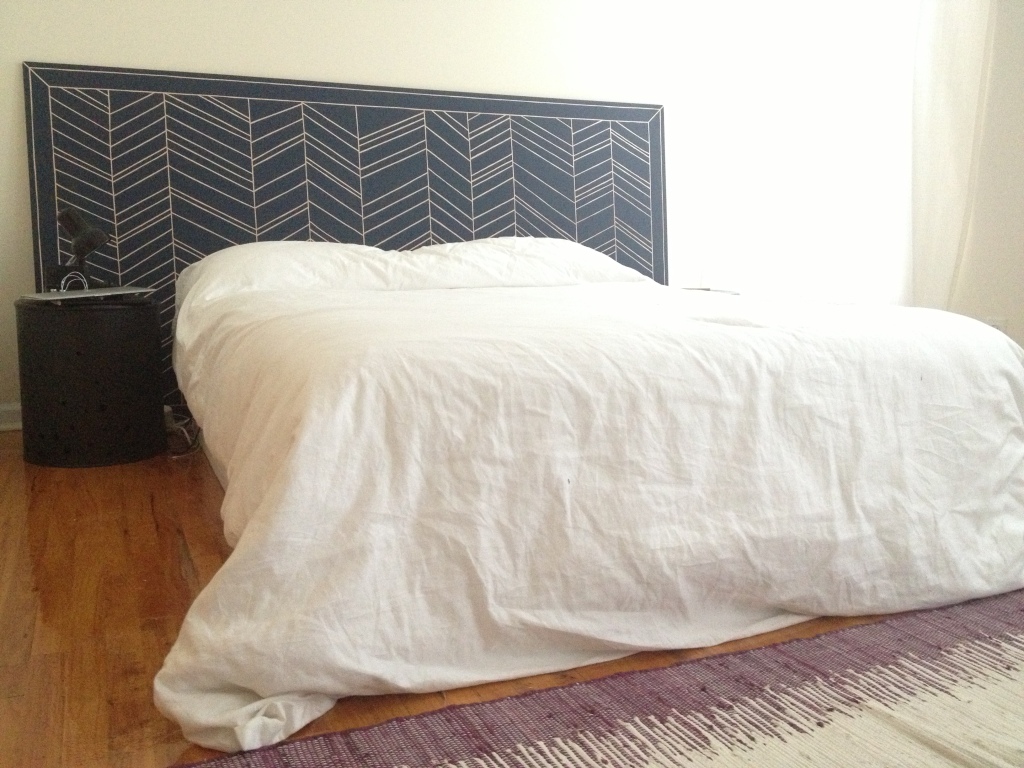
The color balances out our room so well, mirroring the depth of our dresser color across the room. I love it. I LOVE it.

Photo May 29, 7 20 23 PM

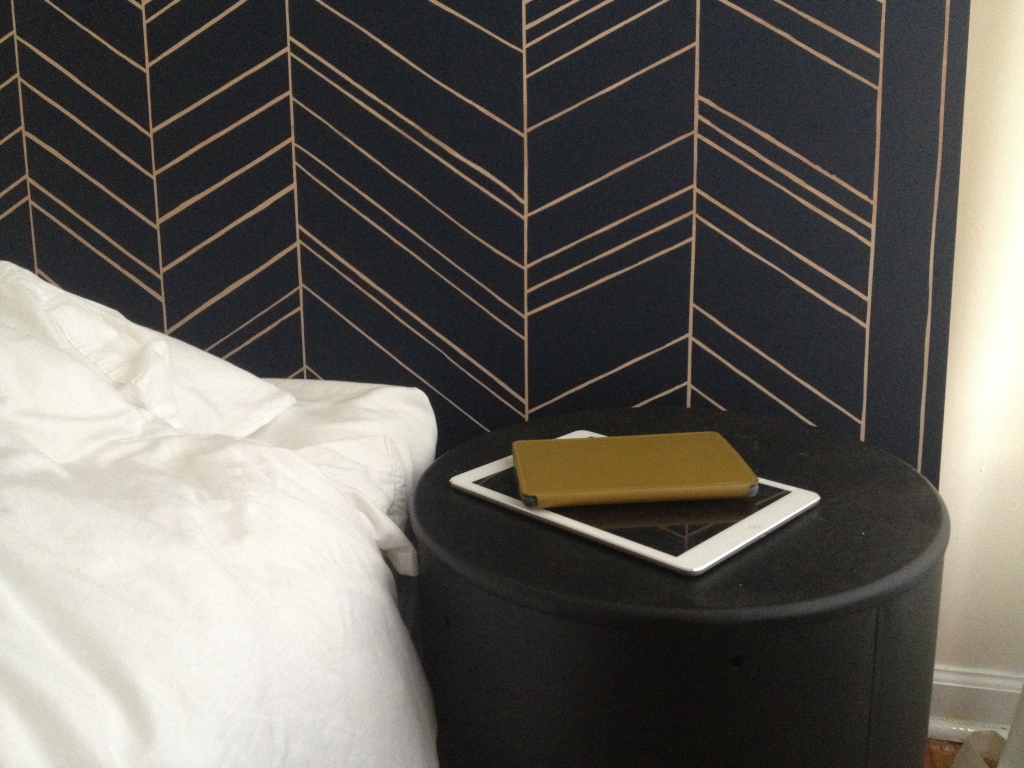
And with our side table nightstands from Target, the whole thing looks like an actual intentional bed. Where people sleep on purpose.

Supplies:

1 quart Starless Night paint in flat by Behr (straight up stolen from this post from The Kitchn)

1 roll painter’s tape

X-Acto Knife

Paint roller and tray

Plastic sheet

Ruler

Pencil

1 piece of 1″ thick 4’x8′ plywood

Approximately 1.5 seasons of Scandal on Netflix

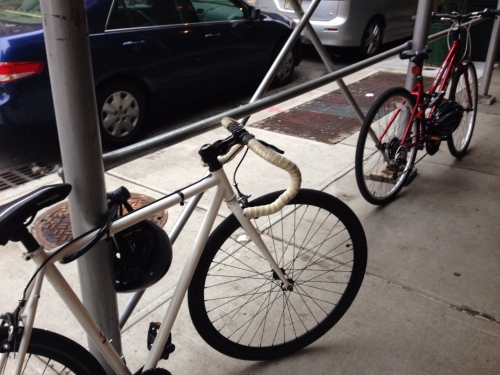
A few weeks ago, when Sam and I biked up to the Cloisters, I decided it was finally time to invest in a bike. The one I had been riding was a hand-me-down from Sam's neighbor to Sam to me, and it finally gave up and pretty much died on 125th street as we did the most dangerous part of our ride, weaving around double parked cars and taxis on our way to the Hudson River Greenway. The chain was messed up and the gears weren't shifting and every time I tried to coast the bike essentially stopped completely. Bananas, as well as totally unsafe.

So I bought a bike! And Monday, we biked down to Emack and Bolio's on the Upper West Side for pre-dinner ice cream. Because what's the point of being childless twenty-somethings if we can't eat ice cream before dinner whenever and as much as possible?

While Emack and Bolio's is admittedly absurdly expensive, when all you're getting is ice cream, it's a pretty cheap NYC date!

While eating our ice cream, we found a park behind the Museum of Natural History in which to sit and watch dogs playing fetch and toddlers on scooters, because while we are happily childless and carefree, we are not heartless fools.
Now that we both have operational bikes, we're hoping to cut way down on our subway usage this summer. Sam even sent me google maps directions to biking to Rockaway Beach! It's only 22 miles. We can do it, right?
 

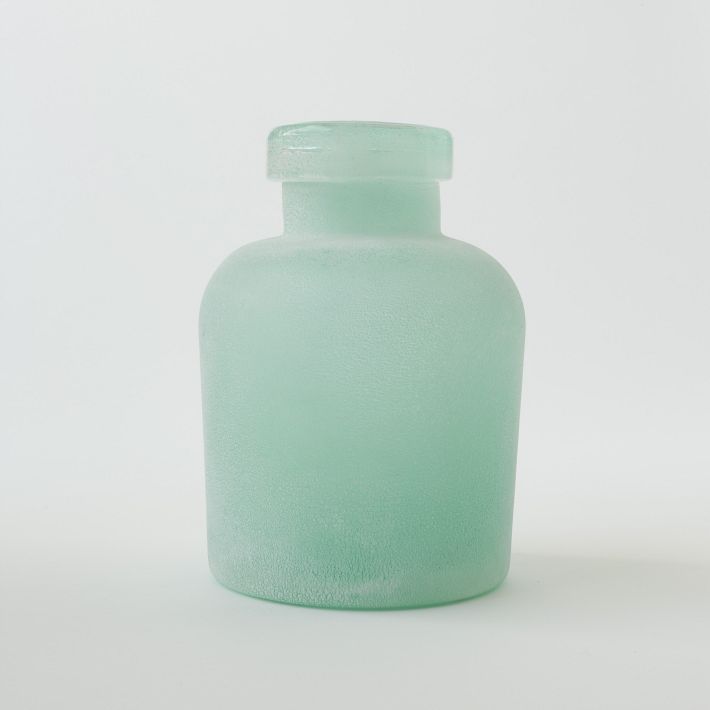
WOW I love these Waterscape Vases from West Elm so, so much.
waterscape vases 2

I’m obsessed with sea glass. It’s so dreamy and beautiful, even though I know it comes from less-than-stellar glass-litter origins.

waterscape vase 2I just can’t stop thinking about summer right now – beachy days, humid nights, grilling in the park, and sea glass.

waterscape vasesI would love to see them on my dresser each day or in a windowsill, filtering the afternoon light. The colors are right up my ally no matter what the object is. Make it beautifully shaped glassware and you’ve got me hooked.

waterscape vaseThe only issue is, um, I never understand super skinny “bud vases.” What, do people seriously just put like one flower in their $30 vase and call it a day? I find that so unsatisfying. Give me a huge container any day for my $5 deli flowers. No matter, I don’t exactly have a “bud vase” budget right now anyway, so I’ll have to find my sea glass the old fashioned way.

(Photos via West Elm)

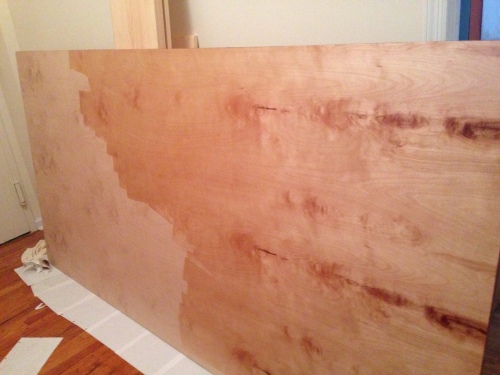
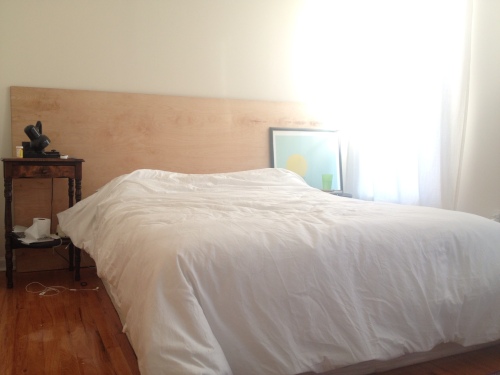
When I asked Sam what he wanted in a headboard for our bedroom, his only request was, “wood.” Now, I love a big, beautiful, wood headboard as much as the next person, but they tend to run on the side of ungodly expensive, so I had to figure out an alternative.

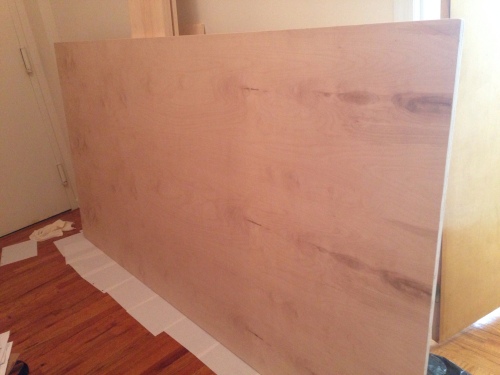
I loved the idea of a huge (cheap!) plywood headboard, but there was the issue of getting it to our apartment from…wherever. Once I decided to build all of those bookshelves, though, I just added it onto our order and had it delivered. Then I relied completely on Sam's brute strength and pure genius to figure out how to get the 4' by 8' sheet of inch-thick plywood up our switchback stairwell without killing us or cracking the wood.

I sanded and stained the edges to give it some contrast and sealed the whole thing to bring out the knots and…

Cue sad trombone. It's not horrible, and it definitely looks ok in this photo, but the color of our walls is kind of same tone as the wood and it ends up just looking sad when it's anything but totally sunny out, which, obviously, is every single night when we get home from work. I think it would look great if our walls were a truer white, but that isn't happening anytime soon since our apartment was painted right before we moved in. I like it better than not having anything, because it feels much more like a bed now instead of a mattress, but I don't think I'll leave it as-is for very long.


This was the first of my projects to turn out truly mediocre. The dresser started out so horrible there was nowhere to go but up, and the bookshelves were hard to mess up because there's so much inspiration out there already. It seemed like a big, plywood board would be too easy to get wrong, but I think because it's essentially just a big, blank canvas that it turned out to be more difficult than I thought. I'm not sure where to go from here. Do I paint it? Stencil? Wallpaper? I still want to get one of these prints to put above it eventually, so I also want to make sure whatever I do will work with starry skies. This is hard! But at least we have a headboard! Or something.


In keeping with yesterday's experience theme, I thought I'd talk about grout.

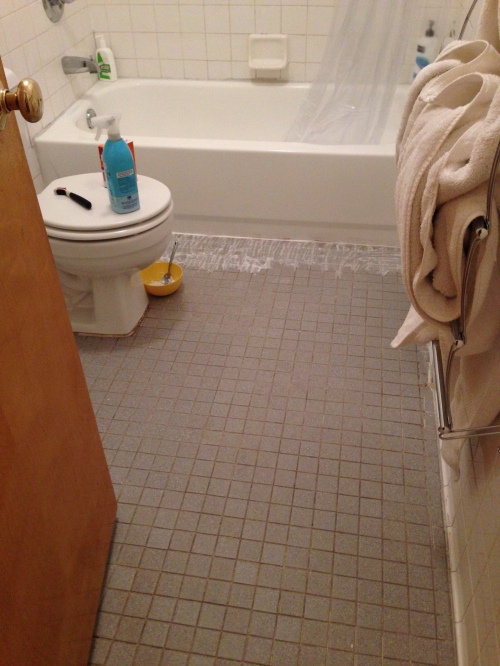
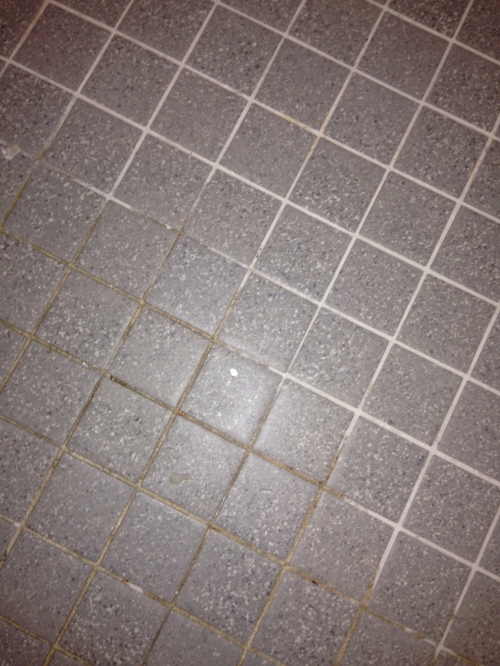
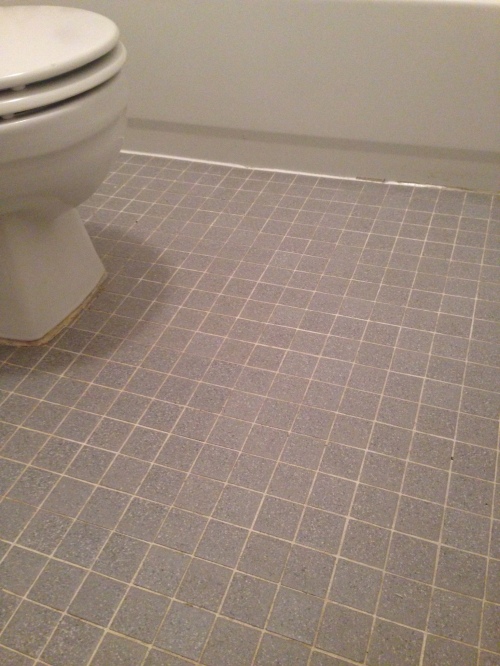
For those of you who are lucky enough to have never encountered a typical NYC bathroom, I'd like you to picture the most horrifying rest-stop or public park bathroom you've ever been to in your life. The moldy corners, the leaky pipes, the suspect smells, and the layers and layers of gunk built up in between the tile. Landlords tell us they've had the bathrooms cleaned before we move in, and yet this is what most of us encounter in the space in which we're supposed to maintain our daily hygiene.

That grout is as black as my soul after I've turned off all of my humanity in order to brave the rats, smell of urine, and many, many pushy subway riders on my morning commute. Which is to say, very black. And completely disgusting.

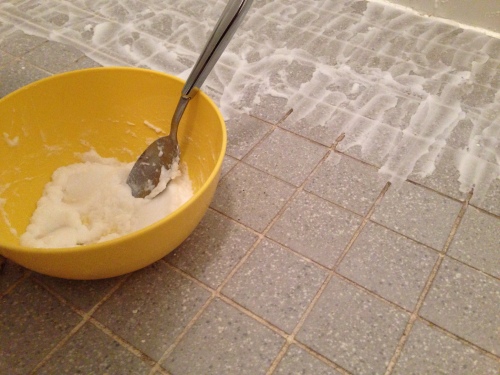
I decided that this apartment would be the first in which I felt truly clean. My last bathroom wasn't so bad, the whole apartment just didn't vent very well so it grew mold no matter how hard I battled. I lost that war, but I was determined not to lose this one. I decided to first attack the grout with my trusty white vinegar and baking soda, as I suspected the floor would take a lot of product to get it clean and I didn't want to waste my expensive cleaner. Full disclosure, though, my mother recommended using Windex to me after I had done half of the floor and I've since gone back and used it on our walls and the particularly difficult sections of the floor that I couldn't get clean the first time, and it works like complete and total magic. I still recommend this version first if you don't want to use up an entire bottle of Windex for your first go-round.

Anyway, there's no particular formula to get it right, just mix the baking soda and vinegar until you reach a consistency that works for you. I progressively made mine thinner and thinner, as I found it worked just as well and spread more easily if it was more the consistency of a sauce rather than paste. You can also add some lemon juice in there. Essentially you're mixing together ingredients that will work together to break down the gunk, and the bubbly-awesome reaction of baking soda with vinegar or acidity does the trick.

I spread it into the grout (and all over the tile) in sections, then let it sit for a good twenty minutes. Using the smaller of these cleaning brushes, I scrubbed (and scrubbed) the grout, until:

*Angels singing* Thank GOD. Clearly it can't look like this forever, but a few months later it still looks pretty good:

Not perfect, but I don't feel like I'm going to contract some horrible disease from walking on my own bathroom floor barefoot. It is amazing how much grime builds up all over apartments in New York City. I'm just happy I don't feel like I'm inhaling it through the steam of my shower every morning. Talk about an experience changer.


I’ve been thinking a lot about materialism. Specifically, is it possible to write about material items on a weekly basis – coveting them, making them, upgrading them for purely asthetic purposes – without becoming, in the end, simply about things?

Sometimes I feel shallow for caring about what our couch legs look like. Shouldn’t having a couch be enough? Shouldn’t the fact that we have an apartment to live in be all we need? It can be difficult to remember why it’s legitimate to care about the aesthetics of my home, let alone write about it, when every day I’m bombarded with articles telling me what trend I need to include in my next project or showing me neverending items that promise to complete whatever look I’m going for. This attitude so clearly goes too far, that it makes me feel like caring at all is to participate in an industry that exists not only to sell but to oversell. Can’t valuable content be created without focusing so much on if we have the Right Things? What about focusing on why we have it, instead?

Because I do think it’s legitimate, even important, to think about what we surround ourselves with and why. I don’t think the “what” is important in the way that we can get trapped into thinking it is. It’s not important to be “on trend” or interesting to anyone but yourself. But part of being human is coming to terms with the fact that we are visually stimulated creatures. And to me, that means that the objects I encounter throughout my day matter.

The first time I saw a Monet painting in person, I was sixteen and visiting England with my Girl Scout troop. And I cried. It was so moving to me, to finally see the color and emotion in person, up close. It was real, and I cried. I thought it was a first time viewing thing, but I’ve since moved to New York and regularly visit Monet’s Water Lilies at the MoMA with Sam. It’s by far my favorite place in New York (I don’t mean favorite museum, or favorite day trip, or anything. I mean if you asked me where I want to go with my free time on any given day, I will probably say I would like to go visit the Water Lilies), and every single time I’ve gone, I’ve cried. They matter to me.

I’m sure you could to find someone who would say Water Lilies doesn’t matter, but I hope it would be difficult, and I have no doubt that the majority of people in the world are on my side of this. Art, and the way it makes us feel, and the way we feel when we are physically in its presence, not just through knowing that it’s out there in the world, is important. It is essential to what it is to be human. In that way, objects matter as well. But sometimes I have trouble remembering that when it comes to the every day things in my life.

We’ve all read the articles citing studies that spending money on experiences rather than things brings more happiness to our individual indexes, and I agree with that philosophy. But what are we doing when we put thought and effort into the objects that fill our homes if not creating a daily experience? We might not cry every time we look at our living room (though I’ve certainly been known to when I come home at the end of the day and find that Sam has cleaned the entire apartment while on break from school), but where we live and how we live there, matters. And the objects with which we choose to populate our lives matter, too.


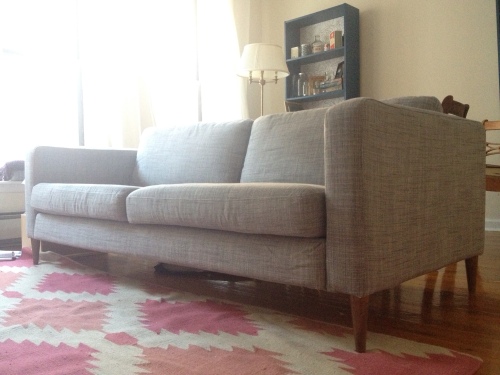
Our sofa saga is equal parts really great luck and truly terrible luck. The first half involved finding the exact couch we wanted to buy from IKEA on craigslist for $100, available to pick up literally 2 minutes from the IKEA we were already planning on going to in New Jersey on the day we moved. It had been sitting in storage, wrapped in brown paper and plastic, as if waiting just for us. We picked it up, then just bought a new isunda grey cover from IKEA to recover it once we got it home. Magic.

There was the little problem, however, that once we took the legs off to get it up the stairs (something that was probably unnecessary), we didn’t have a long enough screwdriver to put them back on. Because I didn’t want to put the new cover on until the dresser was done, and we didn’t want to fix the legs issue until the new cover was on, we sat on the couch frame on the ground for the first two months we were here. While I don’t have a good before photo of the couch (forgive me, I wasn’t a blogger then), you can somewhat see what I was working with here:

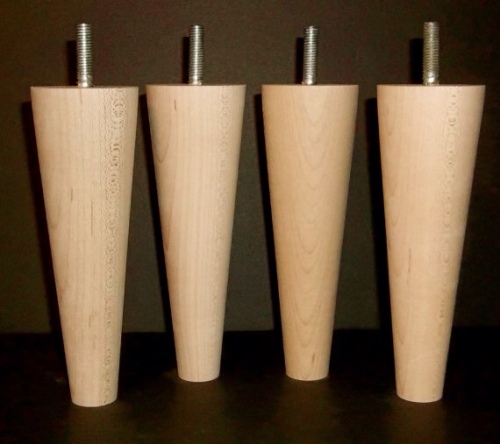
There was also the problem that, regardless of if we could figure out to put them back on the frame, I hated the original IKEA legs. IKEA furniture legs are inexplicably horrible compared to the relative style of their couches. They’re just blocks of unfinished wood, and I knew they would bother me every day if I didn’t figure out a way to improve them. But it’s just for these kinds of issues that the internet has gifted us with IKEA hacks. For those of you who have not been blessed with my particular brand of crazy, you might not be aware that there exists a whole subset of people who not only brave the IKEA superstores, get their purchases home, and spend several hours deciphering ridiculous instructions in order to assemble their purchases, but who then proceed to spend even more time painting, staining, and otherwise altering their IKEA furniture and housewares. I understand this is baffling to many people. It’s ok. Feel free to proceed with the total understanding that there is no reason I do the things I do except to torture myself and others for as long as possible before we finally have a place to sit and watch some freaking TV at the end of a long day.

It’s because of this online sphere that I found a woodworker on Etsy who makes custom IKEA furniture legs. For $35 I got four new midcentury (what else) sofa legs for our Karlstad sofa. They took me about ten minutes to stain and seal, and once they were finished we finally got out the sofa cover we bought on our first trip to IKEA almost two months previously.

It was, of course, the wrong size.

It turns out we bought the full size couch, but it was advertised on craiglist as the smaller love seat, and that’s what I had in my head when we grabbed the cover in IKEA. So we had to haul out to the Brooklyn IKEA on one of the coldest days in January, riding on a ferry while my teeth literally chattered from how frozen I was. The plan was that I would head into the catacombs of IKEA to pick up our new couch cover and a few other things we needed while Sam returned the old cover, but when we walked in the average wait time for returns was 90 minutes. So we pulled a number, we both went and got our new cover, and when we were done there were still 60 minutes to go if we wanted to try to return it. We had a ferry to catch and I was not going to sit out in 10 degree weather for longer than absolutely necessary, so Sam ran back into the warehouse and just…left our too-small couch cover among its brethren on the shelf. And we left.

The lesson in all this is that measuring twice, cutting once applies to craigslit IKEA purchases as well. I’m happy about the mix-up, because I probably wouldn’t have bought the couch if I had realized it was the larger one, but it turns out our apartment can totally handle it so I chalk it up as a win.

Not bad for some $30 legs and a new couch cover (or two). It was simultaneously the easiest and most annoying project in the apartment thus far, and for those of you looking at getting an IKEA couch and who know how to buy the right couch cover on your first trip to IKEA, I’d recommend it!


Last weekend, Sam and I went for the first bike ride of the year! Sam will bike in all weather, but I’ll only bike when it’s sunny and warm. We just went for a ride around Central Park, but our somewhat harried ride to the park reminded me of this video, have you seen it?

It’s a short documentary-style video that efficiently tears apart the terrible state of biking in most of the US from the perspective of a dutch rider. He points out how dangerous it is for people to bike ride here, and how that filters into how we think about biking. Most Americans categorize biking as a leisure activity – I never realized how odd it might seem to a culture that sees biking as a mode of transportation to see Americans putting bikes on their cars to drive somewhere before getting on their bikes. It would be almost like seeing someone tow their car out to a race track to use it for the day before putting it back in the garage for a few weeks. Bizarre.

I can’t stop looking up bike rides to do up here – I’m hoping we can ride up to the Cloisters before this stained glass exhibit closes!